Handheld Fiber Laser Welding Machine
  • How to operate 4th Generation Laser Welding Machine
  • Welding process: generation and avoidance of bubbles
    Dec 01, 2023 Welding process: generation and avoidance of bubbles
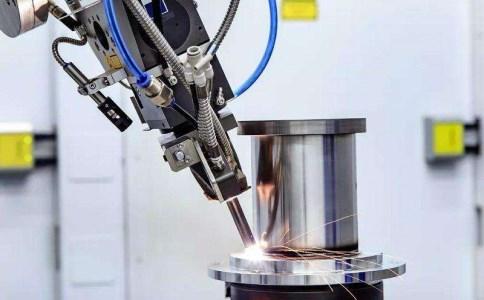
    Why do pores appear? The inside of the laser welding hole is in an unstable vibration state. The flow of the hole and the molten pool is very violent. The metal vapor inside the hole erupts outward, causing a steam vortex at the opening of the hole, which draws the protective gas (Ar) into it. At the bottom of the hole, as the hole moves forward, these protective gases will enter the molten pool in the form of bubbles. Due to the extremely low solubility of Ar and the rapid cooling rate of laser welding, the bubbles have no time to escape and are retained in the weld, forming pores. Also caused by poor protection. During the welding process, nitrogen invades the molten pool from the outside. The solubility of nitrogen in liquid iron is very different from the solubility of nitrogen in solid iron, so during the cooling and solidification process of the metal. Since the solubility of nitrogen decreases with the decrease of temperature, when the molten pool metal cools to start to crystallize, the solubility will drop sharply and suddenly. At this time, a large amount of gas will precipitate to form bubbles. If the floating speed of the bubbles is less than the metal crystallization speed, a bubble will form. pores. Laser fusion welding method to suppress pores 1. Suppress the generation of welding pores through appropriate pre-welding surface treatment methods Pre-welding surface treatment is an effective method to control metallurgical pores in aluminum alloy laser welds. Usually surface treatment methods include physical and mechanical cleaning and chemical cleaning. After comparison, the process of chemically treating the test plate surface (metal cleaning agent cleaning-water washing-alkali washing-water washing-acid washing-water washing-drying) is the best. Among them, alkali washing uses 25% NaOH (sodium hydroxide) aqueous solution to remove the surface thickness of the material, and pickling uses 20% HNO3 (nitric acid) + 2% HF (hydrogen fluoride) aqueous solution to neutralize the residual alkali solution. The surface of the test plate shall be welded within 24 hours after treatment. If the test plate stays for a long time after treatment, it must be wiped with absolute alcohol before assembly before welding. 2. Suppress the generation of welding pores by adjusting welding process parameters The formation of weld pores is not only related to the surface treatment quality of the weldment, but also related to the welding process parameters. The influence of welding parameters on weld pores is mainly reflected in the weld penetration, that is, the impact of the weld back width ratio on pores. The weld back width ratio refers to the ratio of the weld penetration to the weld width. It can be seen from the test that when the back width ratio of the weld seam R>0.6, the concentrated distribution of chain pores in the weld can be effectively improved. When the back width ratio R>0.8, the existence of large pores in the weld can be effectively...
    View More
  • How to use memory card to upgrade and flash screen?
    Nov 07, 2023 How to use memory card to upgrade and flash screen?
    Please carefully read the precautions when swiping your card. Abnormal operations may cause abnormal card swiping. 1. Preparation of SD card 1.1 Preparation of SD card: Please be sure to use a card below 16G. Different displays use different cards, as shown in the following figure: 1.2 Card formatting: After connecting to the computer through the card reader, right-click to format the card. Please note that in the format selection, the allocation unit size is 4096 bytes. Do not use quick format. 1.3 Obtaining the program: take a picture of the code in any place as shown in the picture below. After sending this code to our company's after-sales technical group, we will provide the matching program package in time. 1.4 Put the entire decompressed DWIN_SET folder (it may also be another named folder) into the memory card (please ask our company for related program packages) 2. Screen refresh process 2.1 Insert the SD card with the program into the card slot of the screen when the system is powered off. Power on and wait for automatic flashing. When "END" appears at the end of the second line, power off. 2.2 Continue to power on, wait for the 2023.06.30 value to appear on the first line, and then wait for "END" to appear on the second line 2.3 Power off and remove the card (Be sure to complete the 2.2 operation before flashing is complete. You can flash several more times)
    View More
  • Process: Parameter setting of welding fish scales
    Jan 12, 2023 Process: Parameter setting of welding fish scales
    effect The latest version of the fish scale settings: In spot welding mode, fish scales are enabled in the setting page to achieve the fish scale effect through the appropriate light out duration and intermittent time. Reference Duration (light out time): 20-50ms Intermittent time (off time): 10-30ms The next version is the 320spot weld version, if you are using the latest version, you do not need to follow the configuration below. Video download address (copy to browser) http://gofile.me/6OEn8/9YRVKFKxS
    View More
  • Process: Parameter setting for welding head cutting
    Jan 12, 2023 Process: Parameter setting for welding head cutting
    The cutting setting of welding head of the super powerful Weiye I. Copper nozzle Use a cutting copper nozzle (We recommend that copper nozzle 1.5 or more is enough.) II. craft Unlike welding, cutting spots has no width. Therefore, the scan width must be set to 0, that is, the red light is a point. Sweep speed: Ignore this parameter and feel free to do so Scan width: 0 Peak power: The reference data recommends to be full power cutting, which is subject to actual conditions. Duty Cycle: reference data is 100. Pulse frequency: reference data is 1000. After setting the parameters, if you import and go back, and you can see this process on the left side of the home page. As to the focus, it is recommended to use negative focus (because it directly affects the cutting effect) III. The center point of the red light Be sure to make sure that the red light comes out of the center of the copper spout completely, otherwise it may burn the brass spout. Generally use hardware to make adjustments, that is, to adjust the tail motor. Adjustment method reference: Adjustment of red light IV. Cutting workpieces The requirements of focus: if you use retro-focus, the sluggish that it generates is less relatively. The requirements of valve (using the reduced valves made of oxygen or argon pressure) The requirements of gas: If there is a requirement for the cutting surface, it is recommended to use nitrogen gas (be sure the weight of nitrogen is greater than 6 kg) which means to compare with the cutting surface, it will be whitish relatively. If the thickness of the cut is required, please use oxygen or air to cut, and it will be blackened compares with the cutting surface. Cutting thickness: 3 mm or less is the best. Hand speed is maintained evenly when cutting.
    View More
  • Process: Parameter setting for welding of the welding head
    Jan 12, 2023 Process: Parameter setting for welding of the welding head
    One. The setting of the parameter The first welding mode selection: continuous, and set the process, adjust the desired focus and copper nozzle (The reference value of the process can be viewed in our process) Two. Red light adjustment Please make sure that the red light is in the center, if there is an offset, please refer to: Red Light Adjustment Three. The choice of copper nozzle Three. The choice of copper nozzle
    View More
  • Process: Parameter setting for welding head cleaning 20S
    Jan 12, 2023 Process: Parameter setting for welding head cleaning 20S
    This article applies to change welding into cleaning. Process settings ①Cleaning process Scanning frequency: the swing speed of the motor whose range is 10-100Hz, and it is recommended to set 50. Scanning width: the scanning width of the light plate whose range is 0-150mm, and it is recommended to set 150. Duty Cycle: default data is 100%. Pulse frequency: default data is 2000. After setting the parameters, if you import and go back, and you can see this process on the left side of the home page. ②Be sure to remove the graduated tube and locking part of the welding gun ③Confirmation of focus By the scanning of back and forth, near and far, the focus is when the sound is the largest and the spark is the largest. At this time the cleaning should be carried out according to this distance, and in this time the energy is the strongest. (Generally, the distance from the tip to the plate is about 30 cm and the energy is the strongest) ④The use of gases It is recommended to use air, and 2-3 kg is enough. If you are going to use other inert gases (argon/nitrogen), be sure the flow rate is more than 20.
    View More
  • Process: Use of Spot Welding (Fish Scales and Intermittent)
    Jan 12, 2023 Process: Use of Spot Welding (Fish Scales and Intermittent)
    The version number of the panel monitoring page corresponding to spot welding function is: 330 or more (inclusive) 1. How to use spot welding function 1.1 Play spot weld mode on the first page 1.2 Set the type of spot welding selected inside (fish scales/intermittent). 1.3 Set reasonable lasting time and interval time of spot welding Two. Parameters of spot weld types and debugging First of all, use the way of continuously welding to debug the process. And then use spot welding function to select the spot weld type 2.1 Fish scale welding mode (In this mode, only the laser is turned off when in the intermittent, and other settings such as switching on or switching off light time do not affect and do not take effect.) Only to set the spot welding duration and interval time can produce a fish scale welding effect, and the minimum can be set is 1ms.) For an example Spot welding duration: 150ms(this parameter affects the size of the streak of the weld.) Spot welding interval time: 50ms(this parameter affects the interval between two textures.) 2.2 Intermittent welding mode (In this mode, please turn off the laser, the shielding gas, and stop wire feeding when in the intermittent.) The other parameters such as the time of switching on or off are mainly used for fix length welding.) By setting the spot weld duration to change the weld length, and the spot weld interval time can be set higher. For an example Spot welding duration: 1000ms(this parameter affects the welding length, that is, the time of light flowed up) Spot welding interval time: 5000ms(this parameter can be fixed, and the default is 5000) Please pay attention that in this mode, it needs to be artificially judged whether the wire is broken or not, and the wire needs to be lifted up in time. As it has shown in the picture:
    View More
1 2 3 4 5

A total of 5 pages

How Can We Help You?

Learn more about our products and services? Call +8618856420577
Send a message

click here to leave a message

Leave A Message
If you are interested in our products and want to know more details,please leave a message here,we will reply you as soon as we can.

Home

Systems

about

contact